Manual.ly Logo

Chicco Baby Hug 4 in 1 Egcheiridio-Chrisis

0,0 · 0 Αξιολογήσεις

PDF εγχειρίδιο · 112 Σελίδες

Ελληνικά

M: GO-GEM-FL-25
σελίδα

/ 112

Loading...
c2b283e0701ef547d8f033ee65ada21c6ffd page 10
16
17
CLEANING
Clean the plastic parts with a soft damp cloth. Never use
abrasive detergents or solvents. If the highchair comes
into contact with water, dry the metal parts to prevent
the formation of rust.
MAINTENANCE
• This product requires periodical maintenance.
• Cleaning and maintenance operations must only be
carried out by an adult.
• Periodically check the product for broken, damaged or
missing parts: do not use it in this case.
• To avoid friction that may compromise the correct
functioning of the product, ensure that all the moving
plastic parts located along the metal frame are free of
dust, dirt and sand.
• If necessary, lubricate the moving parts with dry sili-
cone lubricant.
• Store the product in a dry place.
COMPONENTS
The product is completely disassembled when pur-
chased; check that all of the components listed below
are present. If any part is missing contact ARTSANA’s
CUSTOMER SERVICES.
The product and all of its components must always be
assembled by an adult.
A - Height adjustable pedestal frame
A1 - 4 wheels with brakes
B - Seat frame
C - Seat structure
D - Tubular seat frame
E - Fabric (with shoulder straps)
F - Booster cushion
G - Toybar
G1 - Light / sound game buttons
G2 - 3 soft toys
I - Upper fabric zips
L - Plastic clips
M - Height adjustment pedal
N - Backrest recline lever
ASSEMBLY
The product is not assembled when purchased. To use
it, carry out the following assembly operations:
1. The rst thing to do is assemble the “A1” wheels on
height adjustable base frame “A”. To do this place the
frame on a rug or soft surface so as not to damage the
oor or frame. Assemble the 4 “A1” wheels inserting
the pins in the 4 holes under height adjustable base
frame “A” as shown in gure 1.
WARNING: Fully insert the wheel pin into the hole in
the base. At this point the base can be rested on the
oor.
2. Insert the fasteners of seat frame “B” into the respec-
tive tubes on seat structure “C” until they click into
place (Fig. 2).
3. Assemble the seat (seat frame “B” + seat structure
“C”) on the base: insert the two tubes on base “A”
into the corresponding holes on seat frame “B” until
they click into place (Fig. 3).
WARNING: The backrest must face the height adjust-
ment pedal (I) as shown in Fig. 3a.
4. Insert tube “D” into the corresponding holes on seat
frame “B” until they click into place (Fig. 4).
5. To assemble fabric “E” line up the holes on the fabric
with the restraint system installed on seat structure
“C”. Pass the two lateral arms of seat frame “B” through
the side fabric holes (FIG. 5), insert the pins of the
arms into the holes on either side of the backrest (FIG.
5a) until they click into place.
WARNING: Check that both arms are assembled cor-
rectly.
6. Attach fabric “E” using the two perimeter zips above
seat frame “B” (Fig. 6).
7. Pass the crotch strap and waist straps on seat struc-
ture “C” through the holes of fabric “E” (Fig. 7-7a-7b-
7c).
8. Attach the fabric (E) to the bottom of seat structure
“C”, making sure to insert all of the plastic clips in the
right slots (Fig. 8-8a).
BOOSTER CUSHION
9. Reducer cushion “F” is ideal from birth and can be
used or removed as necessary. To attach it to the
seat, place it on the fabric, pass the crotch strap and
waste straps through the holes in booster cushion “F”
(reclined cradle mode), (Fig. 9). In highchair mode it
is also necessary to pass the shoulder straps through
the holes of the booster cushion (Fig. 9a).
TOYBAR
10. The toys can be attached to the toybar by passing the
straps through the plastic openings on the bar (Fig.
10) and fastening the velcro.
11. Assemble the toybar (with the light positioned to-
wards backrest recline lever “N”) inserting the pins of
the bar into the holes on seat frame “B” until it clicks
into place (Fig. 11).
12. To incline the toybar in the three possible positions
press the side buttons (Fig. 12).
13. To remove the toybar press the buttons on the inside
of the bar support and pull upwards (Fig. 13).
WARNING: Always check that the toybar is properly
fastened before using it.
WARNING: To prevent possible injury by entaglement,
remove this toy when the child starts trying to get up
on its hands and knees in a crowling position.
HEIGHT ADJUSTMENT
14. Once assembled, the product can be adjusted to
various heights in all congurations. To adjust its
height, hold down height adjustment pedal “M” (Fig.
14) and lift or lower the seat to the desired height.
ADJUSTING THE BACKREST
15. The backrest can be adjusted to four dierent posi-
tions. To do this, push down on backrest recline lever
“N” (Fig. 15).
Position 1 – Crib mode (Fig. 15a)
Position 2-3 – Reclined cradle mode (Fig. 15b)
Position 4 – Highchair and rst chair at the table mode
(Fig. 15c)
These adjustments can also be made with your child
seated in the product. In this case it will be slightly more
dicult.
WARNING: Always check that the backrest is properly
locked before use.
USING THE SAFETY HARNESS
16. With fabric “E” assembled on seat structure “B”, there
will be a crotch strap, two waist straps and two
shoulder straps (Fig. 16).
17. CRIB MODE - WARNING: Completely remove all
safety harnesses making sure to keep them out of
the reach of your child (Fig. 17).
18. RECLINED CRADLE MODE - WARNING: A 3-point
restraint system must be used: crotch strap + waist
straps (Fig. 18).
19. After placing your child in the seat, reclined cradle
mode, fasten the straps by passing the two prongs
through the crotch strap buckle; adjust the waist
straps so that they t closely around your child’s
waist (Fig. 19).
20. HIGHCHAIR AND FIRST SEAT AT THE TABLE
MODE - WARNING: A 5-point restraint system
must be used: crotch strap + waist straps + shoulder
straps (Fig. 20).
WARNING: In this conguration the toybar must al-
ways be positioned behind the backrest.
21. After placing your child in the seat in highchair
mode, fasten the straps by passing the two prongs
through the shoulder strap buckle (Fig. 21) and then
through the crotch strap buckle (Fig. 21a); Adjust the
height of the shoulder straps so that they correctly
t your child’s shoulders.
Always make sure that the straps are fastened correctly.
To unfasten the strap, press and pull the side prongs.
WARNING: When using the product, always fasten the
straps by inserting them in the crotch strap and check
that they are tight enough and properly fastened.
22. The safety harness straps can be removed (for washing
or for use in the crib/reclined cradle conguration).
To remove the harnesses pull the waist and crotch straps
out from the holes in the fabric (Fig. 22-22a-22b) until
they are hidden on the seat frame and pull the shoulder
straps out from the fabric holes on the backrest (Fig. 22c
-22d). After removing the safety harnesses, make sure
that the harnesses are correctly re-assembled.
To re-assemble the safety harnesses, carefully follow the
steps below:
23. Follow point 7 of the ASSEMBLY paragraph to re-
assemble the waist straps and crotch strap. For the
shoulder straps, pass the strap through the hole as
shown in Fig. 23, making sure that the length adjust-
er is positioned as shown in the gure.
Take the plastic hole of the shoulder straps and pass it
through the fabric ring of the harness (Fig. 23a).
Having performed this operation correctly, pull the har-

Συνομιλήστε με το εγχειρίδιο του Chicco Baby Hug 4 in 1 σας με τη βοήθεια Τεχνητής Νοημοσύνης

Λάβετε άμεσες απαντήσεις από Τεχνητή Νοημοσύνη από το εγχειρίδιο του Chicco Baby Hug 4 in 1 σας

Ρωτήστε οτιδήποτε σχετικά με το Chicco Baby Hug 4 in 1. Οι απαντήσεις προέρχονται από αυτό το εγχειρίδιο, με τις σελίδες στις οποίες βασίζονται.

Baby Hug 4 in 1 Πρόγραμμα συντήρησης

Μετά από κάθε πλύσιμο
Έλεγχος υφάσματος και ραφών

Επαλήθευση της αντοχής του υφάσματος και των ραφών μετά από κάθε πλύσιμο για διασφάλιση της ασφάλειας.

Περιοδικά
Έλεγχος ζημιών

Κανονικός έλεγχος του προϊόντος για σπασμένα, κατεστραμμένα ή λείποντα μέρη και μην το χρησιμοποιείτε αν βρεθούν.

Περιοδικά
Καθαρισμός κινούμενων πλαστικών μερών

Αφαίρεση σκόνης, χώματος και άμμου από πλαστικά μέρη που ολισθαίνουν σε μεταλλικούς σωλήνες για την πρόληψη τριβής.

Όταν απαιτείται
Λιπανση κινούμενων μερών

Εφαρμογή στεγνού λιπαντικού σιλικόνης σε κινούμενα μέρη εάν είναι απαραίτητο για διασφάλιση της σωστής λειτουργίας.

M: QW-35-FL

Κάντε μια Ερώτηση

0/1000

Προτείνετε το Baby Hug 4 in 1;

Ναι Όχι

Frequently Asked Questions

A

Μπορεί να χρησιμοποιηθεί από τη γέννηση σε λειτουργία κρεβατιού και ξαπλωτής λίκνας έως 9 kg, και στη συνέχεια από περίπου 6 μηνών σε λειτουργία καρεκλακίου φαγητού και πρώτης καρέκλας έως 36 μηνών και 15 kg.

Είναι αυτή η απάντηση χρήσιμη;

A

Όχι. Η ξαπλωτή λίκνα δεν προορίζεται για παρατεταμένο ύπνο. Αν το παιδί χρειάζεται να κοιμηθεί για περισσότερη ώρα, πρέπει να χρησιμοποιηθεί κατάλληλο κρεβατάκι ή κρεβάτι.

Είναι αυτή η απάντηση χρήσιμη;

A

Ναι. Η μπάρα παιχνιδιών μπορεί να τοποθετηθεί ή να αφαιρεθεί ανάλογα με τις ανάγκες. Στη λειτουργία καρεκλακίου φαγητού πρέπει πάντα να παραμένει τοποθετημένη πίσω από την πλάτη για λόγους ασφαλείας.

Είναι αυτή η απάντηση χρήσιμη;

A

Το ύφασμα πρέπει να πλένεται μόνο στο χέρι με κρύο νερό. Μην χρησιμοποιείτε χλωρίνη, στεγνωτήριο, σίδερο ή στεγνό καθάρισμα. Ελέγξτε τις ραφές και την κατάσταση του υφάσματος μετά το πλύσιμο.

Είναι αυτή η απάντηση χρήσιμη;

A

Ναι. Και οι τέσσερις ρόδες πρέπει να είναι ασφαλισμένες κάθε φορά που το προϊόν χρησιμοποιείται, ώστε να παραμένει σταθερό και να μειώνεται ο κίνδυνος μετακίνησης ή ανατροπής.

Είναι αυτή η απάντηση χρήσιμη;

A

Ελέγξτε ότι όλα τα μέρη έχουν συναρμολογηθεί σωστά, ότι οι μηχανισμοί ασφάλισης έχουν ενεργοποιηθεί, ότι η ζώνη έχει τοποθετηθεί σωστά και ότι κανένα εξάρτημα δεν είναι σπασμένο, σκισμένο ή λείπει.

Είναι αυτή η απάντηση χρήσιμη;

M: GO-GEM-FL-25

Πλεονεκτήματα και Μειονεκτήματα

Πλεονεκτήματα

  • Ο σχεδιασμός 4 σε 1 μεγαλώνει μαζί με το παιδί από τη γέννηση έως τους 36 μήνες.
  • Το ρυθμιζόμενο ύψος και η ανακλινόμενη πλάτη υποστηρίζουν διαφορετικές καθημερινές ρουτίνες.
  • Η αφαιρούμενη μπάρα παιχνιδιών με φώτα και ήχους προσθέτει ψυχαγωγία στα πρώτα στάδια.
  • Το πλενόμενο, αφαιρούμενο ύφασμα και τα μέρη της ζώνης απλοποιούν τον καθαρισμό και τη φροντίδα.
VS

Μειονεκτήματα

  • Οι αλλαγές λειτουργίας απαιτούν προσεκτική συναρμολόγηση από ενήλικα και τακτικούς ελέγχους ασφαλείας.
  • Το προϊόν πρέπει πάντα να χρησιμοποιείται με το σωστό σύστημα συγκράτησης.
  • Οι λειτουργίες κρεβατιού και ξαπλωτής λίκνας περιορίζονται σε σχετικά μικρό ηλικιακό εύρος.
  • Οι μπαταρίες και τα κινούμενα μέρη της μπάρας παιχνιδιών χρειάζονται περιοδική συντήρηση και προσοχή.
M: GO-GEM-FL-25

Προϊόν Προδιαγραφές

Βάρος

10,20kg

Διαστάσεις (ΠxΥxΒ)

850x880-1220x600mm

Χαρακτηριστικά

ρύθμιζόμενο ύψος, μετατράπετημο σε καρεκλάκι φαγητού, λειτουργία μελωδίας

M: GO-GEM-FL-25

Περιγραφή Προϊόντος

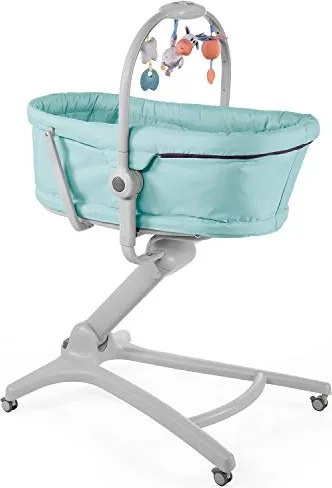
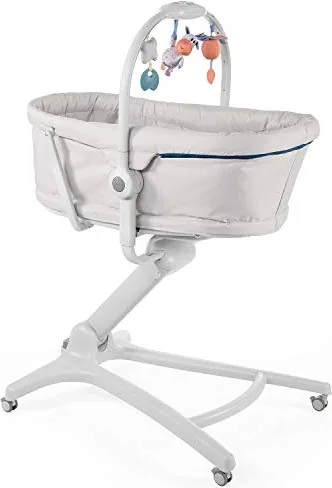
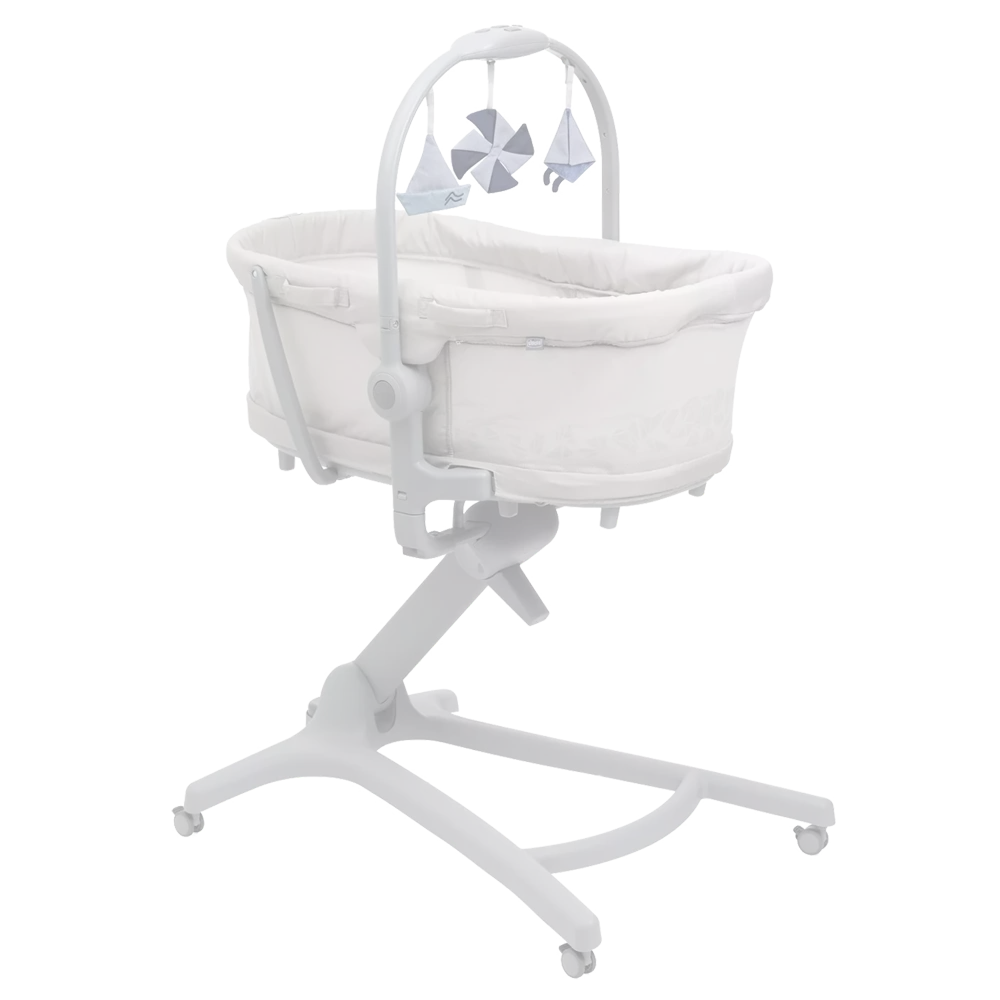
Chicco Baby Hug 4 in 1 Κούνια: Ένα έξυπνο κάθισμα για τα πρώτα τρία χρόνια

Το Chicco Baby Hug 4 in 1 Κούνια ξεχωρίζει ως ένας ευέλικτος σύντροφος για το βρεφικό δωμάτιο, που ακολουθεί το παιδί σε διάφορα πρώιμα στάδια με εντυπωσιακή ευκολία. Από τις πρώτες μέρες στο σπίτι έως τα νήπιακά χρόνια, μπορεί να λειτουργήσει ως κρεβατάκι, ξαπλωτή λίκνα, καρεκλάκι φαγητού και πρώτη καρέκλα στο τραπέζι. Αυτή η ευελιξία το κάνει ελκυστικό για γονείς που εκτιμούν τις compact λύσεις χωρίς να θυσιάζουν την άνεση ή την πρακτικότητα.

Σε λειτουργία κρεβατιού, προσφέρει έναν άνετο χώρο ξεκούρασης για νεογέννητα έως 9 kg, ενώ η ρύθμιση της ξαπλωτής λίκνας δίνει στις οικογένειες ένα άνετο σημείο για επιβλεπόμενη χαλάρωση κατά τους πρώτους μήνες. Αργότερα, όταν το παιδί μπορεί να κάθεται ανεξάρτητα, το προϊόν μετατρέπεται σε καρεκλάκι φαγητού και πρώτη καρέκλα κατάλληλη για γεύματα και καθημερινές οικογενειακές στιγμές έως 36 μηνών και 15 kg. Το αποτέλεσμα είναι ένα μόνο κομμάτι βρεφικού εξοπλισμού που προσαρμόζεται στις αλλαγές της ρουτίνας αντί να μένει αχρησιμοποίητο μετά από λίγους μήνες.

Ο σχεδιασμός εστιάζει επίσης στην ευκολία. Ένα ρυθμιζόμενο σύστημα ύψους βοηθά το κάθισμα να ευθυγραμμίζεται με διαφορετικές διαρρυθμίσεις επίπλων, ενώ η πλάτη μπορεί να ξαπλώσει σε πολλαπλές θέσεις ώστε να ταιριάζει με την προβλεπόμενη χρήση. Μια αφαιρούμενη μπάρα παιχνιδιών με φώτα, ήχους και μαλακά παιχνίδια προσθέτει μια ελκυστική πινελιά, ειδικά στα πρώτα στάδια. Για πολλούς γονείς, το Chicco Baby Hug 4 in 1 Bassinet Manual αποδεικνύεται χρήσιμο εδώ, καθώς εξηγεί πώς να γίνεται η μετάβαση μεταξύ των λειτουργιών με ασφάλεια και να αξιοποιείται στο έπακρο κάθε διαμόρφωση.

Ένα ακόμη πλεονέκτημα είναι η καθημερινή συντήρηση. Τα αφαιρούμενα υφασμάτινα μέρη, οι ζώνες ασφαλείας και οι εύκολα καθαριζόμενες επιφάνειες το κάνουν πιο διαχειρίσιμο για πολυάσχολα σπίτια. Το προϊόν είναι επίσης κατασκευασμένο με ισχυρή έμφαση στη σταθερότητα και την επίβλεψη, υπενθυμίζοντας στους φροντιστές να κρατούν τους τροχούς ασφαλισμένους, να ελέγχουν τα σημεία κλειδώματος και να χρησιμοποιούν το σωστό σύστημα συγκράτησης για κάθε λειτουργία. Αυτές οι λεπτομέρειες έχουν σημασία επειδή ένα πολυλειτουργικό προϊόν πρέπει να είναι τόσο ασφαλές όσο και πρακτικό.

Σημειώσεις

  • Κατάλληλο κυρίως για γονείς που αναζητούν μια μακράς διάρκειας, εξοικονομητική λύση χώρου.
  • Να ακολουθείτε πάντα προσεκτικά τα βήματα τοποθέτησης πριν από κάθε αλλαγή λειτουργίας.
  • Η τακτική επιθεώρηση και ο σωστός καθαρισμός βοηθούν στη διατήρηση της απόδοσης και της εμφάνισης.
  • Η μπάρα παιχνιδιών είναι διασκεδαστική για τα μικρότερα μωρά, αλλά πρέπει να αφαιρείται όταν το παιδί γίνεται πιο κινητικό.
M: GO-GEM-FL-25

© Copyright 2026 Manual.ly